Configuring LAN / WIFI IP on Xprinter
Category: Blog
1. Quick Start Guide & User Manual
2. Driver Installation for Windows / Mac / Linux
Download the corresponding drivers for your device:
https://drive.google.com/drive/folders/1Nj_xiN1Er8i-vx1U_JG8P1deI7xdV1nr?usp=sharing
3. App Installation for Android / iOS
Download the corresponding app for your device:
iOS: https://apps.apple.com/gb/app/l-print/id1288952997
Android: https://appsenjoy.com/5bf8Y
4. Designing and Printing
You can design and print labels directly from any application e.g. word, powerpoint, excel or browser.
Tip: Before printing any media from any application, ensure media size, width and height are set correct based on your physical media dimensions.
4. Help and Support
If you encounter driver compatibility issues on Windows or settings not being saved, re-install the driver again using “Run as Administrator” or login to an Administrator account to install the driver.
Do contact us if you encounter any difficulties during the installation process.
If you encounter issues during installation visit the link below:
http://www.nichepeak.com/faqs/troubleshooting-printer-issues/
Follow this link to learn how to care for your thermal printer:
How to care for your thermal printer
5. Frequently asked questions and answers (FAQs)
- How to get the program correctly installed to my Mac computer?
MacOS itself has a very sophisticated security mechanism. If you’re installing software that isn’t certified by Apple, it triggers this defense mechanism. So you need to change the Security & Privacy in your Mac first. You can Google search the steps or ask us to send the steps for you.
- Prints lines in label and not clearly, how to make it right? And how to print a full postage label on the 4×6 labels?
For PDF printing, we recommend Adobe Acrobat Reader DC this software to open and print, remember to set the “Halftone” to “None” if you use other format file. For Mac users, go into the cupsctl web interface and make changes to the printer. Some user suggest changed the color option to “none” and print darkness to “15” and they came out crystal clear.
For how to print full label: Make sure the label size to print is correct, There is setting change between label sizes for you need, you can find the setting for labels size.
WHAT IS EZY2SHIP?

Singpost’s ezy2ship is an online shipment management system leveraging on SingPost’s delivery solutions, e.g mail, courier services.
Currently, as of June 2017, these are the services that users can book from the ezy2ship platform:
- Registered Mail
- Speedpost (Courier Delivery Service)
- POPstation
Not too long ago, at the start of June 2017, Singpost upgraded their new ezy2ship system and interface. Now, it has a more modern and clean design that is in line with their main landing page on www.singpost.com.

They have also shifted from the old www.ezy2ship.com to www.ezy2ship.net. Fret not if you have an existing account with them, your account details are automatically transferred over to the new system.
WHY USE EZY2SHIP?
You enjoy the convenience of being able to book, manage and track your shipments on an online platform. Gone are the days where you have to spend precious time at the post office to ensure you pen down all your shipping details correctly.
Simply put, your visit to the post office becomes much more pleasant as you just need to get your item scanned and accepted by their staff. Those behind in the queue will really thank you for it!
So let’s get right to it shall we?
EZY2SHIP GUIDE
STEP 0: Sign up for EZY2SHIP account
You would first need to sign up with an account on www.ezy2ship.net. Once you are done with the boring bits, we can finally get started!
You would need to login before proceeding with the next step.
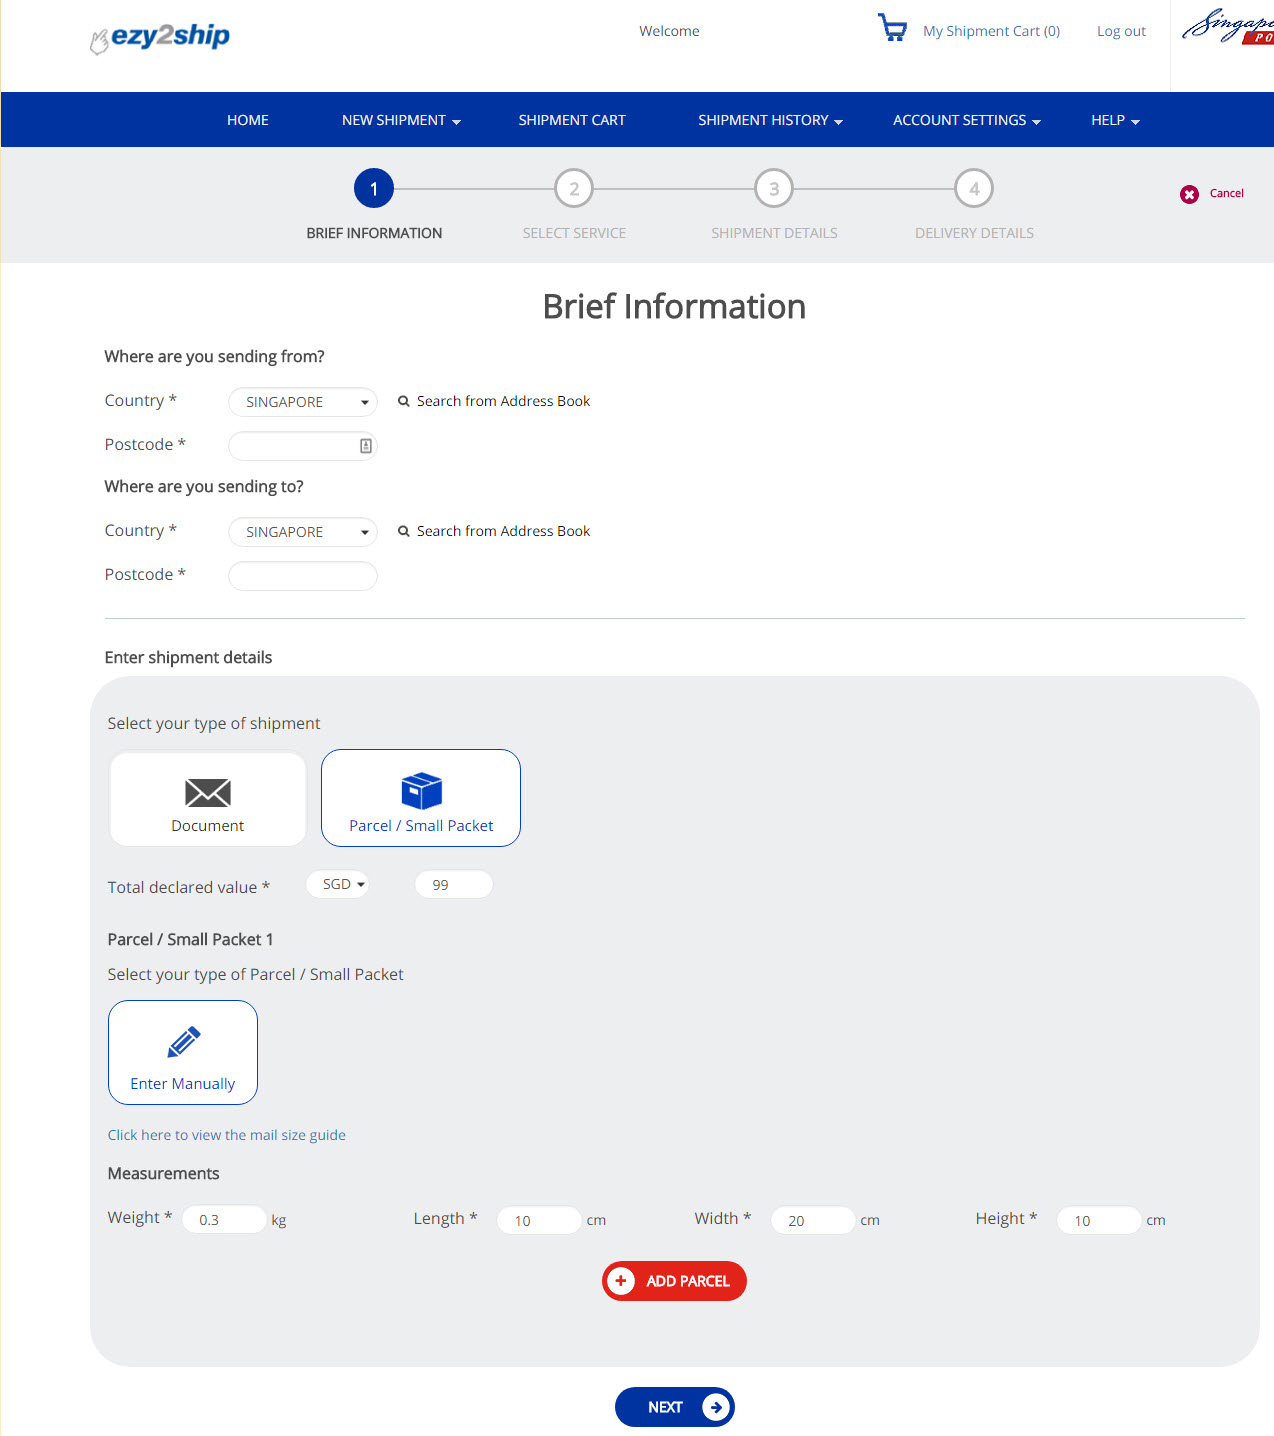
STEP 1: Brief Information
- Start filling in the Country and Postal Code you’re sending from and to.
- Enter your shipment details. (Type of shipment, Value, Measurements)
- Click on “ADD PARCEL” to ensure your data is saved. (@SingPost take note of this bug)
STEP 2: Select Services
Unlike the old ezy2ship platform, the new platform organizes the services into 4 types:
Mail – Choose this for Registered Mail or SMS mail (not available as of this writing)
Express – Speedpost Express
Priority – Speedpost Priority
Standard – Choose this for Speedpost Standard or POPstation

Select your desired service option. Do note that POPstation is now “hidden” under “Standard” option.
We certainly hope SingPost can make the available services more visible. It took us quite a bit of tinkering before figuring out how to send via POPstation.
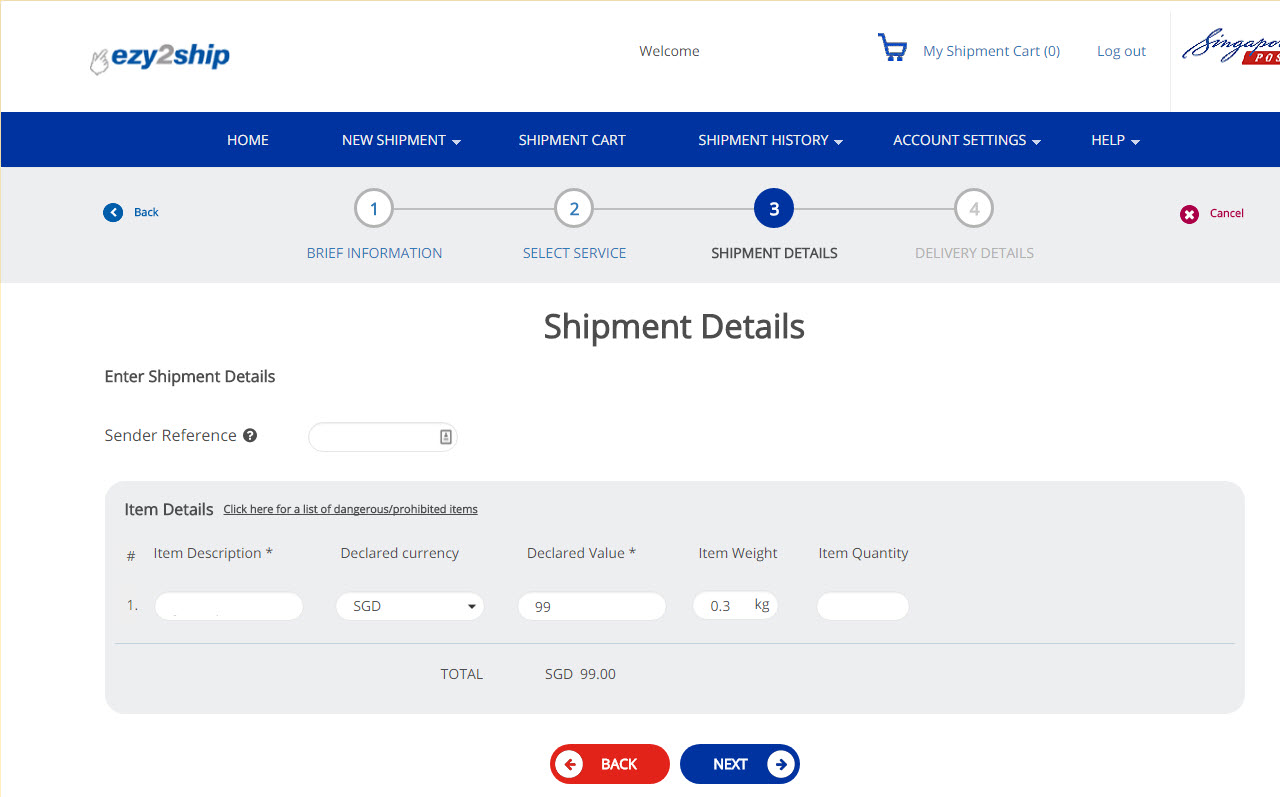
STEP 3: Shipment Details
Fill in your item description, declared value, etc.
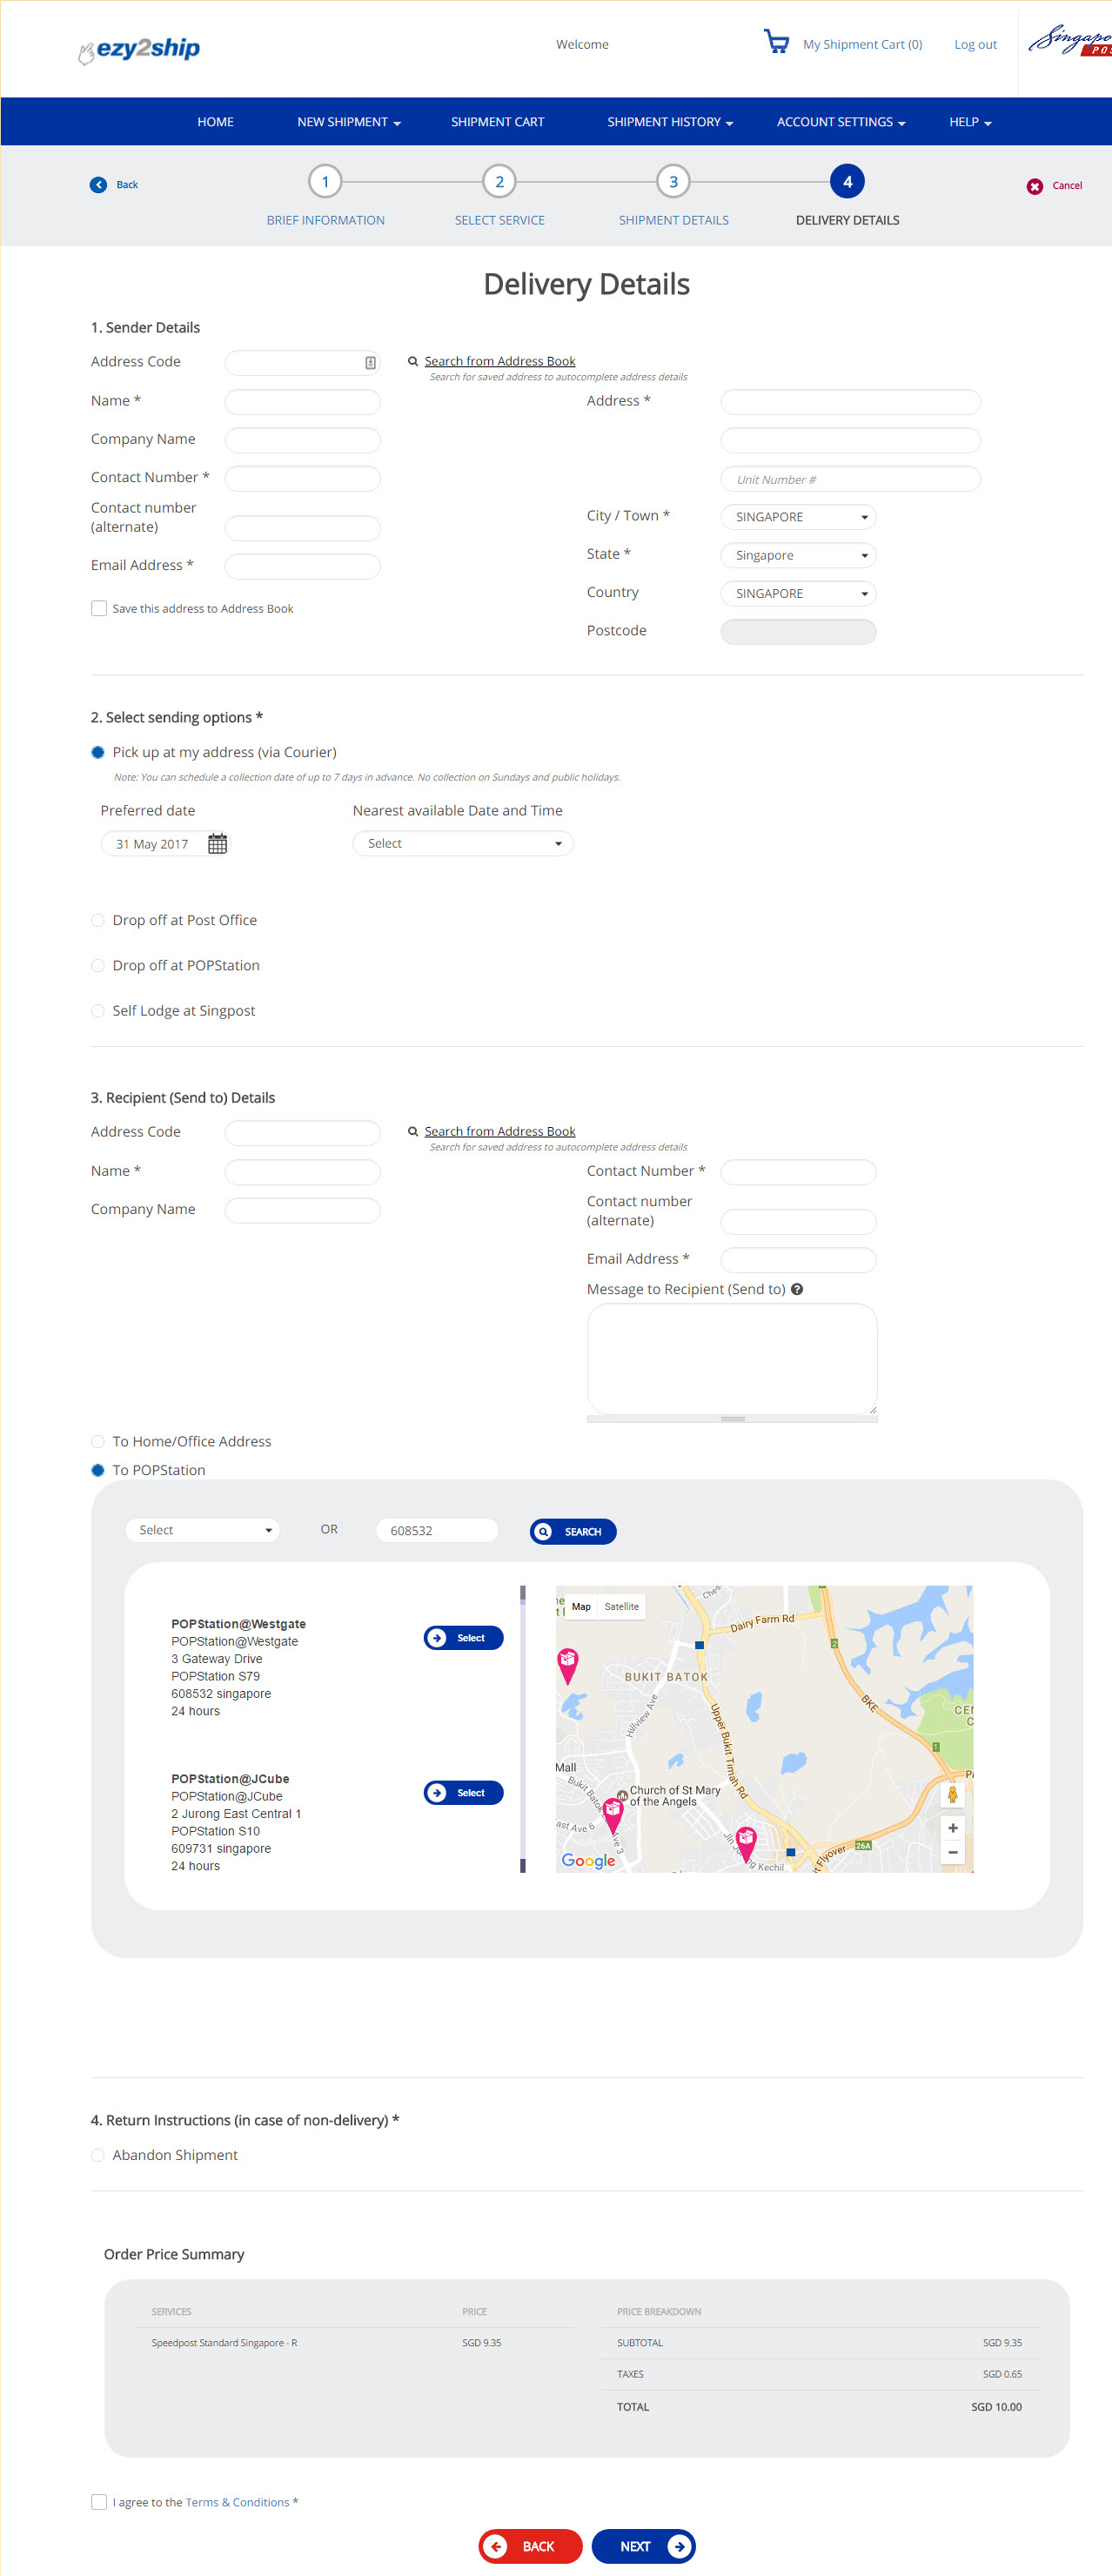
STEP 4: Delivery Details
- Fill in the Sender Details
- Select sending options (If need POPStation drop off, remember to select “Standard” in Step 2)
- Fill in the Recipient Details (Here you select to send to Home/Office address or POPStation)
- Return Instructions (@SingPost I don’t think Abandon Shipment makes your users feel easy in case of non-delivery)
- Once done, you will see your Order Price Summary. Confirm your details before you proceed.
STEP 5: My Shipment/Payment
Here you will see all the shipments you have created within ezy2ship.
Double check your details are correct and you may proceed to pay.
Currently, they only accept credit cards or debit via eNETS, so get them ready.

STEP 6: Complete Shipment Process
This is where you will see the shipment you just paid.
From here, you can choose to “Print Labels”, “Print Manifest” or “Print Invoice”.

STEP 7: Prepare the Shipping Label for your Shipment
Do you find printing on A4 paper, cutting it out and taping it to the shipment too much hassle?
Why not try out affordable label printing solution that is optimized for ezy2ship labels?
We offer a simple fuss-free 2 step process where you just print and paste with our self-affixing labels!

Save time and energy! Curious? Get in touch with us now!
Final Thoughts on the new ezy2ship interface
Here is our quick take on the new interface after tinkering with it for some time.
Pros: Clean modern user interface, great readability over the old interface.
Cons: Too many steps involved. POPStation is “hidden” under Speedpost.
While it’s refreshing to see SingPost moving on to streamline their design theme onto their other platforms, we hope they can streamline the ezy2ship shipment creating process to cut down on needless steps and make it more intuitive for end-users.
What do you think of the new ezy2ship interface? Feel free to comment and share your thoughts and opinion below!
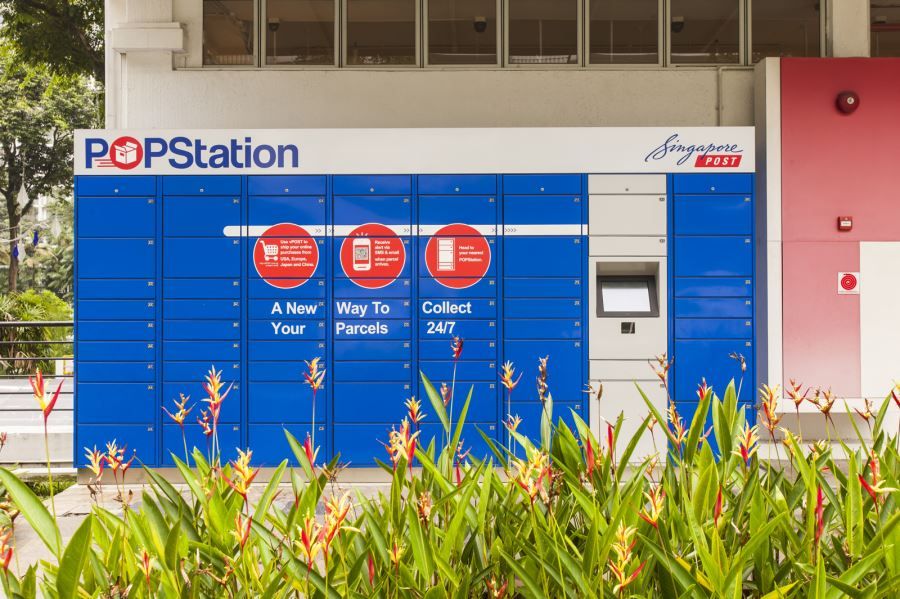
What is POPstation?
Even if you are totally clueless, it is hard not to notice these big giant blue lockers tucked away in many corners of Singapore. In fact, there are already 140 of them and increasing. SingPost’s POPstation has provided consumers a ton of convenience with regards to how they can collect their mail or parcels.
Those of us who do online shopping regularly on platforms like Taobao, Qoo10, Zalora, etc, are already enjoying the benefits of being able to collect our parcels at our own time. Gone are the days where our parcels are delayed when there is no one to receive it at home.
But do you know what is the really good thing? Anyone can send items using the POPstation system to leverage on the convenience it brings. Whether you are business selling your items online or just an individual who sending a personal item, giving your recipient the option for POPstation collection just offers them much ease and convenience. In fact, they will love you for it! So why not jump on the bandwagon to send your items or parcels through POPstation?
STEP 1: Sign up for EZY2SHIP account
*Update* 1 June 2017: Singpost has a new EZY2SHIP portal, we have created a new guide for it!

You would first need to sign up with an account on www.ezy2ship.com in order to use POPstation to send items. Once you are done with the boring bits, we can finally get started!
You would need to login before the next step.
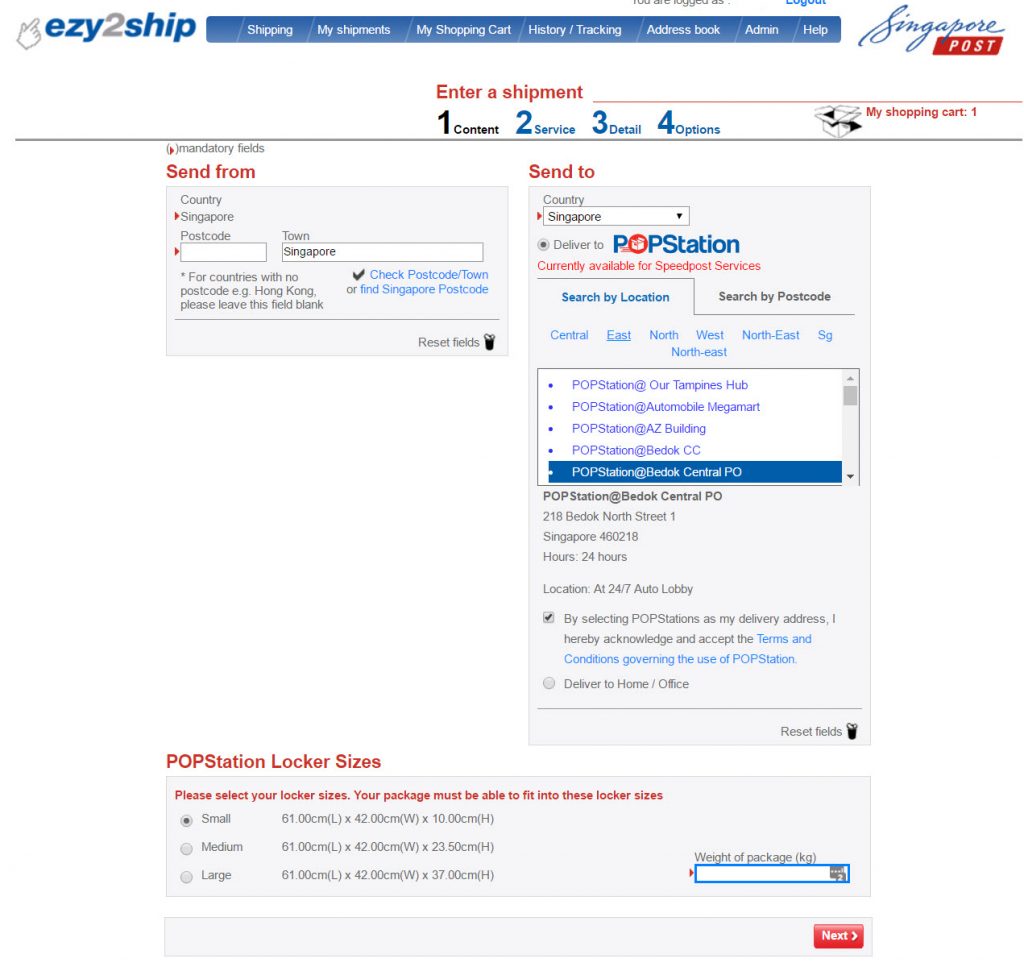
STEP 2: Fill in Shipping Details
- Start filling in the “Send From” and Send To” sections.
- Select your desired POPstation from the list of locations.
- Select the correct locker size for your parcel. Put in the weight too.
STEP 3: Service Selection

Currently, only Speedpost Standard Delivery available, so let us go with that. Though, we hope they can offer an express same day delivery some time in the future.
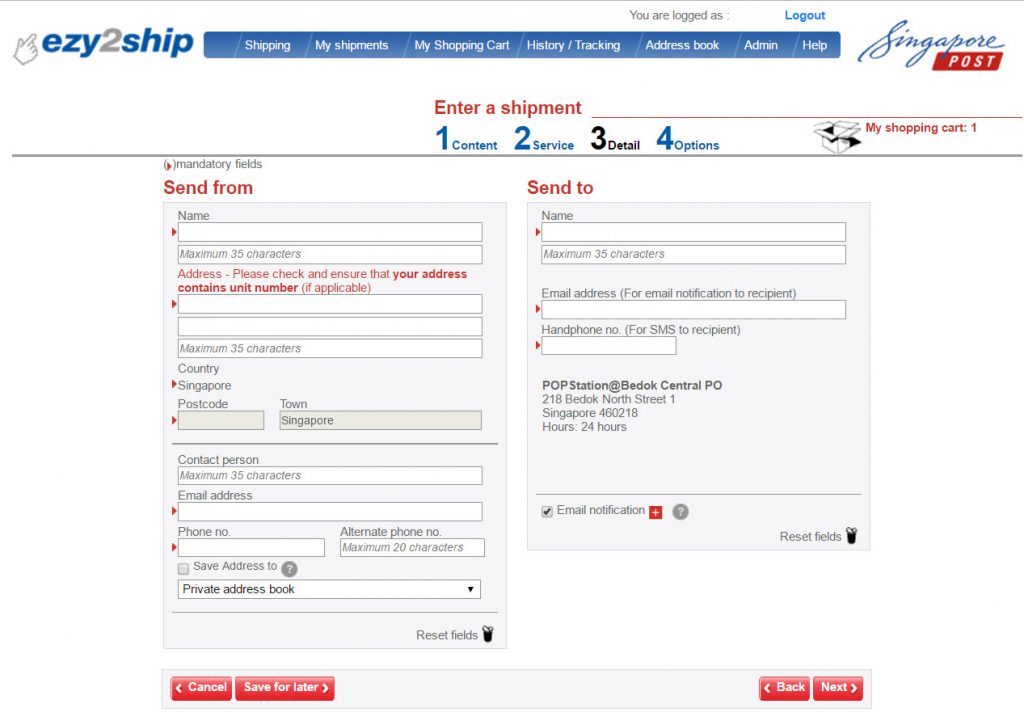
STEP 4: More Details
Crucial information in this step is filling in the mobile number of your recipient.
SingPost will be sending them an SMS with collection details once item ready for collection.
We also highly recommend you add in your own email address in case your recipient did not receive the SMS or deletes the SMS by accident.
STEP 5: Collection/Drop Off Options

You can drop off item at a POPstation of your choosing, at a Post Office Counter (you need to queue), or request a door pick up by their couriers.
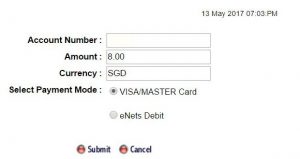
STEP 6: Payment

Double check your details are correct and you may proceed to pay.
Currently, they only accept credit cards or debit via eNETS, so get them ready.
STEP 7: Item Summary & Shipping

This is where you will see the POPstation item you just created and paid.
Now, select just your item (you do not need to select “Instructions” or “Tax Invoice”) and click “Print Selected Documents”
STEP 8: Prepare your Shipping Label for your Parcel
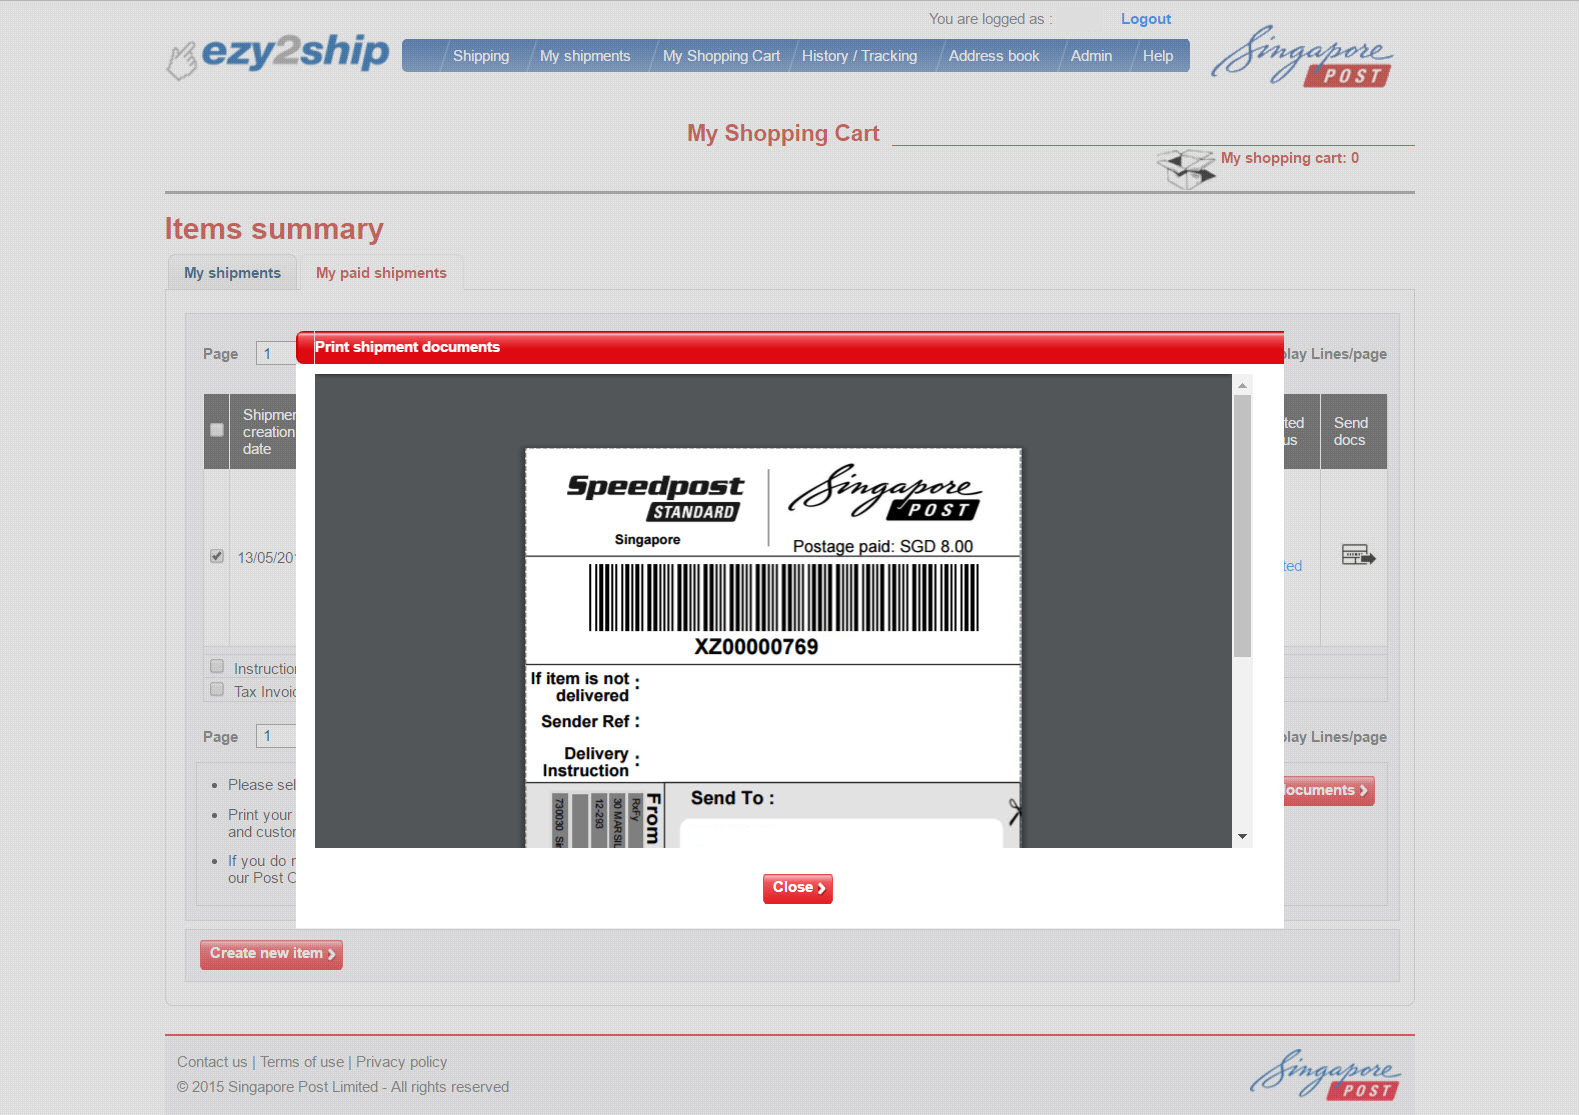
This is where you save or print out your shipping label.
If you find printing on A4 paper and then cutting it out manually too much trouble?
Why not try out affordable label printing solution that is optimized for POPstation labels?
Curious? Get in touch with us now!
STEP 9: Post the Parcel at your selected POPstation

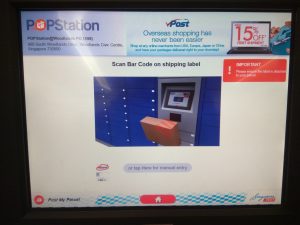
Now that our parcel label is affixed properly, it is time to head off to our selection POPstation to post the item.
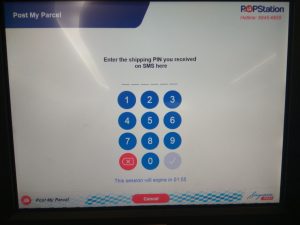
At the main screen, select “Post My Parcel”, Scan the Barcode, and enter the PIN sent to your phone, select the locker size and confirm the drop-off.
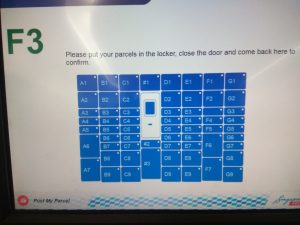
STEP 10: Sit back and let the magic happen!
In the meantime, thank yourself for giving your recipient so much convenience!
We hope with this guide more people will be able to bring the convenience of POPstation to others. Remember to spread the love and share! Feel free to comment and share your thoughts and opinion below!
Carousell’s bid to generate revenue!
Our favorite Carousell app has finally implemented a spanking new feature just near the start of May 2017.
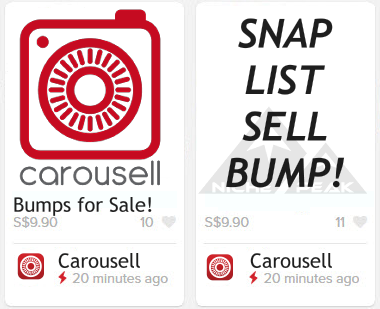
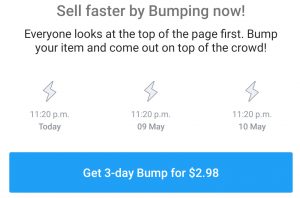
“Bumps” as they like to call it; helps push your listing up to the top of the marketplace, thereby giving it more visibility, and possibly more sales. It comes at a little cost (about 1 dollar per day for the 3-day Bump), though there are free options available.

Most people can see this little feature as a way for Carousell to sustain itself through monetizing their in-app service. We think it is a good start for a well-polished app that has been gradually building up for years now.
However, let us dive deeper to uncover what “Bumps” is all about and perhaps evaluate it further to see where it leads us. Time to go tinkering in the app!
HURRAY to blocking re-listings
In view of this new “Bumps” feature, the Carousell team has implemented a new blocking algorithm in the app to prevent users from putting up another similar listing. You can see it in action below.

This is an important and a much-needed feature as these illegitimate bumps are a direct competitor to the official “Bumps” that is in place. Prior to this, users have to report spammers and thereafter the admins have to take action. This is all too time-consuming. So kudos to the Carousell team for coming up with the new blocking algorithm!
Humans Vs Machines

But how effective is this system, you ask? Who comes out on top? Well, we have been doing some controlled tests, coupled with our keen observation of the marketplace. Here is what we have seen:
- Legitimate variants of a product can be wrongly blocked.
Specifically, if your title, description, images are very similar, there is a chance it might be blocked even if they are essentially different variants of a product. This can be quite frustrating for people as currently there is no way to return back to edit after you hit the “Sell” button.
Perhaps the Carousell team can consider a friendlier option as it’s quite frustrating to start from scratch and figure out what’s wrong.
- Some users have found the loophole in the blocking algorithm
From our observations, they do this by carefully changing just one variable (title, description, images) to essentially get a relist of essentially the same item.
- Dropping price to get free “Bumps” every 7 days.
While this is a legitimate way to bump up your listing, the 10% price dropping mechanism does not really work. Users can simply bring the price back up after getting the free “Bumps” and the “Bumps” is still in place. Perhaps the Carousell team can improve the algorithm to factor in this.
The War on Re-listings a.k.a. illegitimate “Bumps”

It is quite clear how these illegitimate “bumps” can undermine Carousell’s brand new “Bumps” feature. Legitimate sellers might see no reason to purchase paid “Bumps” if their competitors can keep relisting for free by circumventing the blocking algorithm.
Hence, it would be interesting to see how the Carousell team tackles illegitimate bumps and users trying their luck to circumvent the new blocking algorithm. Perhaps improving the blocking algorithm and taking harsher actions against users who consistently flout the rules despite warning?
Final Thoughts
To be fair, a shiny new feature always comes with some specks of imperfection here and there. We certainly hope the Carousell team will resolve these issues over time. But it is really great to see a new system in place that makes the marketplace more friendly and usable for all.
For now, it would be interesting to speculate the direction “Bumps” will take in the future. We suspect they might even offer a permanent “Bumps” that will stay on top of the marketplace for a premium price.
What is your take on Carousell’s new “Bumps” feature? Any interesting observations? Feel free to share your comments below.
 Pages vs. Posts
If you’re new to WordPress you may be wondering what’s the big deal behind Pages and Posts. At first glance they appear to be one and the same: if you were to create either a new page or a new post you’d be presented with nearly identical interfaces and in many cases the public appearance of pages and posts will look the same.
Don’t let this fool you. There’s a very fundamental difference between the two and that difference is what makes CMSs, like WordPress, great platforms for integrating blogs with traditional websites.
Pages
Think about the kind of pages that make up a typical website. Most often you’ll see pages like “Home”, “About Us”, “Services”, “Contact Us”, etc. Within WordPress these are often treated as Pages; documents that have no particular regard for the time they were posted.
For example, when you visit the “About Us” page of your favorite company’s website you don’t expect the content to be very different from what was available there a week ago.

Categories and Tags
If you write about a variety of subjects, categories can help your readers find the posts that are most relevant to them. For instance, if you run a consulting business, you may want some of your posts to reflect work you’ve done with previous clients, while having other posts act as informational resources. In this particular case, you can set up 2 categories: one labeled Projects and another labeled Resources. You’d then place your posts in their respective categories.
Plan Your Content
If you’re considering adding a blog to your site, you’ll want to have a plan beforehand. Planning your blog will help your subject matter remain consistent over time. It’ll also help you determine whether or not there’s enough material to maintain a steady stream of posts.
One pitfall many new bloggers run into is starting a blog that isn’t posted to frequently enough. A shortage of recent posts can give your visitors a bad impression of your business. One may think “I wonder if they’re still in business” or “they may want to hire a writer.”
A blog, like any other customer facing aspect of your business, communicates your brand. If it isn’t maintained and given proper attention, people will notice. Post regularly and keep your content fresh. Give your audience a reason to visit often.